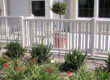

The fencing that surrounds your project says a lot about it. Once the temporary construction fence comes down, what you put in its place becomes peoples’ first impression. A quality fence lets folks know that what they’ll see beyond it is worth their attention.
You want something that’s going to look good now and last through the years. It would be a shame to have the fence degrade even as the quality workmanship you’ve done inside holds up. That’s why a lot of contractors choose vinyl.
Our team at Vinyl Craft can help you get the right vinyl fencing for your project’s unique needs. We don’t offer installation services, but we do have tips to help you get the fence up as smoothly as possible. Plus, a high-quality vinyl fence makes this process fairly easy, especially for an experienced contractor.
So, without further ado, here’s your step-by-step guide to installing vinyl fencing.
#1: Get Set Up for Success
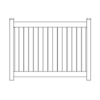
First up, choosing the right fence for your project goes a long way toward making setup easier. You can tell our team about the site and its planned usage so we can recommend the right style of fencing and the perfect color of fencing to match the level of quality of the new construction inside the fence line. We can also help you determine how much material you need.
Once you get the vinyl materials, keep them covered and out of the sun. We wrap all job lot orders in the same way that the manufactures wrap them coming from the factory. This will prevent any warping that could make installation trickier.
Finally, gather up what you’ll need. We generally recommend:
- A post hole digger/auger
- A rubber mallet
- String line and stakes
- A level
- A tape measure
- A drill
- Concrete mix
- Vinyl Glue (sold separately)
- An appropriately sized container for mixing the amount of concrete you’ll need
- A trowel to spread and smooth the concrete
#2: Set the Fence Posts
Plot out the fence posts based on the size of the panels you chose. Your string line and stakes will help you keep everything organized here.
Dig your post holes. We recommend digging approximately 12” in diameter and 30” deep for 5”x5” posts..
Place the post. Note that some come with metal inserts. Most vinyl manufactures recommend using metal inserts on gate posts, end posts, corner posts, and one every 100’ in a straight line.
Mix your concrete, then fill in the hole to stabilize the post. Use your level to make sure the post is straight.
#3: Installing the Fencing Panels
Attach the included U-channels to your posts with at least three evenly spaced screws.
Once both U- channels are in place, slide your bottom pocket rail into the routed holes closest to the ground. Most 6’ privacy fences will have at least a bottom rail stiffener. Next, slide your Tongue and Grove pickets into the bottom rail and flush against the U-channel. After all T&G pickets are in, slide the top pocket rail into the top routed hole. You may have a top rail stiffener for dark colored vinyl and certain brands of white. You can secure the top rail in place by partially drilling a single screw (at an angle) into the top of the rail inside the post before placing the post cap.
Darker colors of fencing often come with picket inserts (2 per panel) to prevent warping since darker colors absorb more heat, for example.
#4: Put on the Finishing Touches
Put the post caps on. Vinyl Glue is recommended to keep the post caps on securely. and clean up around the area. We don’t recommend backfilling against the panels or posts because that can create discoloration and bowing. Instead keep the area around the fence clear.
If the fence itself needs any cleaning after installation, use water with a little bit of mild soap or Simple Green.
While we don’t offer installation services, we’re experts on vinyl fencing. We can answer any questions you have and help you get set up for a seamless installation. To talk with us about the right fencing for your project, contact our Vinyl Craft team today.